Thursday, December 27, 2012

An Italian Evening (5 Recipes!)

Today was my first whole day off in longer than I can remember. No plans at all. And of course there's no way I could sit around and do nothing. I thought it would be best to put these all in one post. They are all linked to on their original sites in each recipe section. If you time it right you can do the last 3 all at once. Otherwise at least the pizza and the garlic knots. They cook at the same temperature.

These are the things I made today:

Mozza
Pizza Dough
Pizza
Garlic Knots
Tomato Soup

_________________________________________________


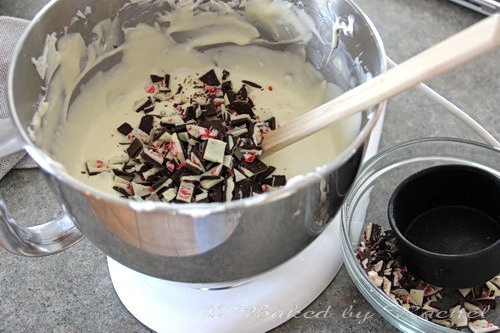
I got a make your own Mozza kit for Christmas (only my boyfriend would think of that) so I decided that would be my first task of the day. The kit makes over 8 pounds of cheese but we figured One would be enough for today. I came out with three fairly good sized balls. I never knew it was so ridiculously easy to make your own cheese.

Rennet + Water
Citric Acid + 4L Milk
Boil, Mix, Let sit, Stir, Strain and heat.
You can braid it, make larger balls, bocconcini, or whatever your heart desires.
Sits in a water bath for 3 hours, tightly wrap and it will keep for 10 days or so or freeze.

You can get your own kit here:

http://www.makecheese.ca/


_________________________________________________

Sean and I decided that after making our own mozza we should probably have pizza.

I wanted to do a thin crust but I decided on a dough recipe I already knew. This is an easy and quick recipe from Stefano Faita on CBC.

Pizza dough
2 3/4 to 3 cups all purpose flour
1 tbsp. salt
1 cup warm water
1 tbsp. sugar
1 package (1/4 ounce) active dry yeast
 
In a large bowl, combine 2 3/4 cups flour and salt. Set aside.
In another bowl, add warm water, sugar and yeast. Stir to combine. Let sit until yeast starts to foam, about 5 to 10 minutes.
Add yeast mixture to flour mixture. Stir or work with your hands until dough starts to form into a ball. Transfer to work surface. Knead until smooth and elastic, about 7 to 8 minutes, adding more flour if dough is sticky.
Transfer dough to an oiled bowl and cover. Store in a warm place until it doubles in volume, about 30 to 40 minutes.
Punch down dough. Cut in 1/2. Roll each piece into a 10-inch round.

I rolled out one half into about a 12" pizza, so it was a bit thinner. I preheated my oven and cast iron griddle to 400ºF so the crust would get a bit of a head start on cooking as soon as I put it on the hot pan. I also poked holes in the dough with a fork so it crisps a bit more on the bottom.

_________________________________________________

We decided on a basic pizza:

Spinach
Prosciutto
Homemade Mozza
Basic Pizza Sauce (I cooked alot today, just used Eden's Organic Sauce from a tin)
Basil
Olive Oil

After crisping up the crust for 5-10 minutes in the oven, put your choice of sauce on and the cheese. Place back in the oven for 7-10 minutes until it gets a bit melty.

Take it out and sprinkle on the Spinach and Basil. Put on as much meat as desired and pour a bit of olive oil across pizza.

Put back in the oven for 2 minutes to heat through.

_________________________________________________

With the other half of the dough I decided to make "Not your Average Garlic Knots" which made Rachael Ray's top 10 downloaded recipes of 2012. I didn't make this exactly how it goes just because it was kind of a spur of the moment decision. I also only made half.

The only ingredients I left out were the rosemary and provolone. I have no doubt it would have been 10 times better with those. But they were still great. This was a recipe that was to be made in a bundt pan, which many of us have but not many of us use. I actually don't have one so I just oiled up a little baking dish.

Since the oven is the same temperature as the pizza you can definitely make both at the same time.

Here is the original recipe:

Nonstick cooking spray
4 tablespoons butter
2 cloves garlic, finely chopped
1 pound store-bought pizza dough, cut into 1-inch balls
2 tablespoons finely chopped rosemary
Coarse ground sea salt
Black pepper
1 cup shredded provolone
1 cup grated Parmesan

Tomato sauce, homemade or store-bought, for dipping
 
Preheat oven to 400ºF.
Prepare a bundt pan with non-stick cooking spray.
In a small saucepot, melt butter with garlic. Pour into a large mixing bowl and toss together with pizza dough balls, rosemary, sea salt and black pepper. Place half of the dough balls into the bundt pan, top with half of the cheeses. Top with remaining dough and finish with remaining cheese. Bake 30 minutes. 

_________________________________________________

For the final recipe I decided on a tomato soup to start off with. Since I wasn't originally planning on the garlic knots. This was another recipe from Rachael Ray's TV show. I didn't do the egg noodles although they definitely interest me for a future recipe. I used everything except the bay leaf because we couldn't find any. I also never have whole milk in my house and used 1%.

Ingredients

2 tablespoons EVOO – Extra Virgin Olive Oil
1 onion, finely chopped
4 large cloves garlic, finely chopped
1 carrot, finely diced
Salt and pepper
2 tablespoons fresh thyme, chopped
1 large fresh bay leaf
3 tablespoons tomato paste
1 quart chicken stock
1 28- to 32-ounce can hand-crushed San Marzano tomatoes
A few leaves basil, torn
2 tablespoons butter
2 tablespoons flour
1 1/2 cups whole milk


For the soup, heat oil, 2 turns of the pan, in a large soup pot over medium to medium-high heat. Add onions, garlic, carrot, salt, pepper, thyme, bay and cook partially covered to soften 10-15 minutes, stirring occasionally. Add tomato paste and stir 2 minutes; add stock, tomatoes and basil. Simmer partially covered for 30 minutes, remove and discard bay leaf.

Purée soup in a blender and return to pot. (I used an immersion blender and never had to pour it out and back into the pot)
 
To make the béchamel sauce, melt butter in a saucepot over medium heat, whisk in flour and cook 1 minute. Whisk in milk, season with salt and pepper, and let thicken to coat a spoon. Stir béchamel into soup to combine.

White Chocolate Peppermint Bark Cheesecake

When I first made peppermint bark this year and found this recipe in the suggested section there was no way I couldn't make it. I love cheesecake. Its seriously my favourite dessert.

We got invited to a Christmas party/potluck. As my boyfriend takes it upon himself to brag about my baking I got sucked into bringing two things. My Jalapeno Cheese Buns as well as this. They were both well received and needless to say none came home with me. I did make sure I was first in line for one of each so I at least got to enjoy it myself. This cheesecake does take some time compared to some others I've made but it was worth it for sure.

I attempted this again in mini size and I didn't even think to adjust the cooking time - down to 35/40 minutes is recommended. It'll make 12 of the mini size. When I made it the second time I added a touch less peppermint extract. That was just my personal preference.

With all that said, here's the recipe and photo!

*If you need some extra clarification, there's some great photos at many of the steps on the original site.

White Chocolate Peppermint Bark Cheesecake
(Adapted slightly from Baked By Rachel)

Crust Ingredients:

2C chocolate cookie crumbs (or 22 regular oreos with filling – not double stuffed)
3 tbsp butter, melted

Filling Ingredients:

3 – 8oz containers or blocks cream cheese, softened
1C sugar
4oz white chocolate, melted
1 1/2 tbsp flour
1 1/2 tbsp heavy cream
1/4 tsp salt
2 tsp peppermint extract
3 eggs
1/2 batch peppermint bark, made thin or roughly 1 1/2C chunks

Mousse Ingredients:

1/2C cool whip, softened
4oz cream cheese, softened
2 oz white chocolate, melted
1 1/2 tbsp sugar
1/2 tsp vanilla

Decoration:

2 oz Cream Cheese
1 Cup Cool Whip
1 tsp Vanilla
1 Tbsp Vanilla
Peppermint snow
Grated chocolate


____________________________________________________-

Preheat oven to 350 degrees. Prepare a 10″ spring-form pan with two sheets of tin foil. In a food processor, blend cookies until only fine crumbs remain. Add melted butter. Give a quick blend. Transfer crumb mixture to spring-form pan. Shake to disperse crumbs. Using a flat bottom cup, press down to create an even crust. Bake crust for 10 minutes. Set aside.

Reduce temperature to 325 degrees.

Cut up peppermint bark into small pieces. Set aside.

Begin melting 4oz white chocolate. Using the microwave, in a heat safe bowl microwave for 30 seconds at 50% power until fully melted. Stir well after each interval.

In stand mixer, beat cream cheese until smooth. Add sugar. Mix well. Scrape bowl well prior to each new addition and as needed. Add melted chocolate, flour, whipping cream, salt and peppermint extract. Mix well. On medium/low speed, add one egg at a time. Mix until smooth and blended well.

Add peppermint bark pieces, stir by hand.

Transfer spring-form pan and cooked crust into a larger pan, such as a large roasting pan.

Pour filling into crust. Add enough hot water to reach half way up the sides of your spring-form pan. Carefully place in center of oven. Bake at 325 degrees for 1 hour. Turn off the oven. Keeping the door shut, leave the cheesecake in the oven for an additional 45 minutes. Remove and allow to sit for at least 1 hour before chilling.

Chill 4 hours or overnight before adding the mousse.

In a medium bowl beat softened cream cheese, melted white chocolate, cool whip, sugar and vanilla until smooth and slightly thickened.

Carefully remove side of spring-form pan. Spread mousse mixture evenly over cheesecake. Chill for 4 hours or overnight before serving.

I also made a little topping dollop for each slice to help with division. To do this, Mix the first 4 ingredients (2 oz Cream Cheese, 1 Cup Cool Whip, 1 tsp Vanilla and 1 Tbsp Vanilla) quickly with a hand mixer or stand mixer until well combined. Mixture should still be fairly close to the consistency of cream cheese. I then piped this around the outside of the cake in even dollops. See photo.

Serve slices with chocolate shavings, crushed peppermint candies and whipped cream.
Store covered in the refrigerator.


Chocolate Pecan Caramel Candy Bars

The last of the three recipes we chose for our crazy baking day! This one has the longest name and was probably my favourite. It was a little more intense than the others to make but it will definitely be on my Christmas Baking list for next year.

To make it a bit easier to get out of the pan, we actually used Crisco to grease the foil. There was no way anything was sticking to that! The only other thing I would say with this recipe is that it would probably be easier to make it twice instead of doubling it.

Here`s the recipe and flashcard picture!

1 1/2 Cups AP Flour
1/2 Cup Firmly Packed Brown Sugar
1/2 Cup Unsalted Butter

Topping:

6 Tbsp Unsalted Butter
1 Cup Brown Sugar - Firmly packed
3 Tbsp Honey
3 Tbsp Heavy Cream
2 Tbsp Maple Syrup
1 1/2 Cups Chopped Pecans or Walnuts (We chose Pecans)
1/2 Cup Chocolate Chips

Preheat oven to 350ºF, Line a 9x13" baking pan with foil and grease foil (we used crisco for greasing).

To make crust, combine flour, sugar, butter and mix until crumbly. You can do this in a food processor a mixer or even by hand. Pat into the bottom of the pan (on foil). Bake for 12 minutes or until set. Remove and cool the pan on a rack.

To make topping, in a sauce pan, heat butter until it melts and bubbles. Add brown sugar, honey, cream and syrup and bring to a boil over medium heat while stirring constantly. Let boil without stirring for 1 minute. Pour over the hot/warm crust and sprinkle with nuts. Bake for 12 - 15 minutes or until caramel layer is bubbly. Remove from oven and sprinkle with chocolate chips. Let melt, then swirl with a spatula. Let cool and peel off foil. Makes about 3dz 1 - 2 inch squares.

Ours turned out a bit thicker than the picture but they were a great consistency through out.


Swirled Peanut Butter Bars

I'll be honest, I don't like peanut butter. I mean in a classic PB&J or spiced up for a Thai sauce, I'm in. But standard peanut butter things, I'm not overly into. But this was another one of the recipes we picked for our Pre Christmas baking spree.

We doubled this one for two 9x13" pans. They turned out really good, maybe a little rich tasting for me - but every peanut butter fan I know liked them. These probably won't make my Christmas baking list, but don't let that stop you. Because if it sounds up your alley - it probably is and it turned out great and was easy.

Here's the recipe and flashcard picture!

1/2 Cup Room Temperature Butter
1/2 Cup Sugar
1/2 Cup Brown Sugar Firmly Packed
1 Egg
1/3 Cup Creamy Peanut Butter
1 Cup AP Flour
1 Cup Quick Cooking Oats
1/2 Tsp Baking Soda
1/4 Tsp salt

Icing

1 Cup Icing Sugar
1/2 Cup Peanut Butter
3-4 Tbsp Heavy Cream (We used about 10 tbsp for a double recipe)
2 Cups Chocolate Chips

Preheat Oven to 350ºF. Lightly grease a 9x13" baking pan. Cream together butter and sugars until light. Add egg and peanut butter and mix until blended. In another bowl mix together the flour, oats, baking soda and salt. Add to butter mixture and mix until blended. Pat into prepared pan.

Bake for 20 - 25 minutes or until lightly browned.

Icing:

Stir together sugar, peanut butter and enough heavy cream to form a runny mixture (Ours never really got "runny" but it got thinner).

Remove baked bars from oven and sprinkle with chocolate chips, let melt for a couple minutes. Drizzle or spoon peanut butter mixture over the chocolate and swirl with a spoon or butter knife. Let cook on a rack. Makes about 4dz 1 - 2 inch squares.

Here's the flashcard picture - ours looked almost identical.

Frosty Snowmen

My friend and I decided to band together and bake our faces off for a whole day, pre Christmas. She had this really awesome flashcard deck of Cookies, Bars and the like so we picked out 3 recipes to take down in our day.

This is the only one we didn't double to share, they turned out great.I had to add ALOT more liquid to the glaze to make it glaze like. But that was all. Really could have been because of our wonderful dry weather here in Calgary. We also had a bit of trouble with the dough tearing while we were rolling it out. Overall though, I will be adding these to my Christmas list of baking for years to come.

I found a similar sized snowman cutter and used peppermint snow for the buttons, as we found out that the nutty club went out of business and no longer sells those cute little silver button balls anymore! I did find a few at my out of town IGA, I may have bought more than I'll use. Ever. (But they're Mine) You could also use any other shapes holiday themed or not!

Here's the recipe and the picture on the back of the flashcard:

1 Cup Icing Sugar
1 Cup Unsalted Butter
1 Egg Yolk
2 Tsp Grated lemon zest (I'd use organic, since you're zesting)
2 1/4 Cups AP Flour
1/4 Tsp Salt

Glaze:
2 Cups Icing Sugar
2 Tbsp Fresh Lemon Juice
1 Tbsp Chambord (or other raspberry liquor)

In a bowl cream together sugar, butter, egg yolk and lemon zest until light in colour and smooth. Add flour and salt and mix to form a dough. Shape into a ball, wrap in plastic wrap and chill until firm.

Preheat oven to 375ºF. On a lightly floured surface roll out dough about 1/16 of an inch thick. Using a 2.5 inch snowman cookie cutter, cut out cookies. Place on greased baking sheets. Bake for 8-10 minutes or until lightly browned around edges. (Mine took 9 minutes in a regular, non convection oven.) Transfer to racks to cool. *We got 80 cookies with a 3.5 inch cookie cutter.

To make glaze, in a bowl whisk together sugar, lemon juice and chambord to make a thin, transparent coating. Spread on cookies.

*I probably used about another 3 Tbsp of liquid, half lemon juice and half chambord. This made way more glaze than we needed (but that's ok) and it did come out a light peachy pink colour. I used an offset spatula to spread it, worked great.


Tuesday, November 13, 2012

Peppermint Bark

I really wanted to try making this popular Christmas treat myself. At Williams Sonoma, it's $39 a pound. Don't get me wrong, its good. But for me, that's a little steep and I just couldn't see it being that hard.

I found a recipe and a really cute idea from one of the food bloggers I follow. My blog isn't awesome enough (yet) to be able to do give away's, but maybe one day. I couldn't find the silicone mold that she used in hers but I did find Lollipop Molds that worked great. More later. I don't think it could have been much easier to make this.

I made 2 batches. One batch I used Wilton Candy Melts in a vanilla chocolate mint flavour, with candy cane pieces in it already. In the other batch I used regular white baking chocolate and just flavoured it with the peppermint oil and sprinkled some crushed up candy canes on top before it hardened. I used Williams Sonoma Peppermint Snow. But only because I had some. Candycanes are just fine. In both batches I used Semi-Sweet baking chocolate for the darker layer flavoured with the peppermint oil.

The batch that I made with the Wilton melts I put into candy molds. Soo cute its almost lame. I'm more thinking for Christmas gifts or trays with those. Spoiler alert for all my friends reading this. This is what you get. The molds and the melts were pretty cheap at Michaels, both $4 each. Well 2 molds/$4. And since we all know Michaels sends out coupons every week you can definitely save some money on them. They also had some really great gift boxes and tins.

For the second batch I just smeared it pretty thin on a parchment lined cookie sheet. I did the dark chocolate and let it sit for about 15 minutes in the fridge before I did the white chocolate on top. Sprinkled with some Williams Sonoma Peppermint snow. There's a chance that I may never stop making this now. I've also seen some really great variations on Martha Stewart's Site.

*I've been having some trouble with links getting reused on some of the bigger sites, so I thought that I would start putting the recipe within my site as well as the link. Just in case.

Peppermint Bark & Shapes
(Adapted from Peppermint Bark)
Makes 3 lollipop molds

4oz chocolate of your choice (I used Semi Sweet)
4oz white chocolate
1/2 tsp Vegetable Oil
1/8 tsp Peppermint Extract for White Chocolate
1/8 tsp Peppermint Extract for Semi Sweet Chocolate
Crushed candy canes or peppermint candies. Powder removed*

*To remove powder, crush candy over a fine mesh strainer. Shake gently until all powder is removed.

If you want to use the wilton candy melts like I did you don't have to add the oil or the peppermint extract to the White chocolate. Its also super handy in that you can just put all of the melts into a disposable decorating bag and melt in the microwave. This is especially good for the shapes as it makes it easier to get into the corners.

__________________________


In a small to medium sized measuring cup or bowl (I like one with a pouring spout) add milk or dark chocolate and 1/2 tsp vegetable oil. Melt in the microwave in 30 second intervals at 50% power. Stir well after each 30 seconds. When fully melted, add 1/8 tsp peppermint extract. Stir well.
(I also did this with a double boiler, the microwave method is probably a better choice, unless you're doing alot. A double boiler was messy and took a lot longer.)
Pour chocolate evenly among mold cavities, filling no more than half full. Chill for at least 10 minutes.
Repeat process with white chocolate. Remove from molds after fully hardened. Store in the fridge.
__________________________

I doubled this recipe for 6 molds, plus had a little extra to do some plain "bark" style. To do this I simply poured the chocolate on a parchment lined baking sheet, let set for a few minutes and then poured the white chocolate on top. Sprinkled with my peppermint snow and put in the fridge. After about 2 hours I broke it apart into about 2 inch pieces. 


Southwestern Sloppy Joes

This recipe caught my eye on one of the weekly emails I get. I usually scroll through and delete them pretty much right away. The link on this one was broken and I still went on a search to find it. As I've made no secret of, I enjoy spicy food. As long as its a nice, well flavoured dish.

Sloppy joes are super easy to make yourself and although that manwich sauce is pretty tasty and even easier, this is a good way to make sure you're eating what you want to eat. Control the salt and the spice and even the meat type. We were going to make these with ground dark meat turkey but when Sean got to the grocery store he texted me to ask if we could have them with bison. Bison is probably my favourite meat when it comes to burgers anyways so why not? It's pretty much on par with the nutrients/fat/calories in turkey with substantially more flavour.

Other than the bison meat change we found we needed a bit more of the passata to make it "Sloppy". We also found this made waaay more than 4 servings. So far we've gotten 8 and there's probably at least 4 more left. This will depend on how much you put on each bun though.

Here's the recipe adapted slightly with how we made it.

Southwestern Sloppy Joes
(Adapted from Canadian Living)


1 tbsp (15 mL) olive oil
1 onion, diced
1 jalapeño pepper
2 cloves garlic, grated or minced 
1 lb (454 g) lean ground bison (Or beef)
2 tsp (10 mL) chili powder
1-1/2 tsp (7 mL) ground cumin
1-1/2 tsp (7 mL) ground coriander
1 pinch salt
1 pinch pepper
1 pinch cayenne 
1-1/2 Cup (375 mL) bottled strained tomatoes, (passata)
1 can rinsed drained black beans
1/2 cup (125 mL) frozen corn kernels
2 tbsp (30 mL) lime juice
2 tsp (10 mL) liquid honey
Hamburger Buns
Shredded cheese

In large skillet, heat oil over medium heat; cook onion, jalapeño pepper and garlic, stirring occasionally, until softened, 6 to 8 minutes.

Add bison; cook over medium-high heat, breaking up with spoon, until browned, about 5 minutes.


Add spices; cook for 1 minute or until fragrant. Add tomatoes, beans, corn, lime juice and honey; cook until slightly thickened, 5-10 minutes. 


In the meantime, if you'd like, toast your buns. I recommend this to keep the integrity (somewhat) of your Sloppy Joe. Otherwise that bun will be a soggy mess in no time!

Divide evenly among bottoms of buns; sprinkle with cheese. Cover with tops of buns or leave open face for a higher meat to bun ratio.


Monday, November 12, 2012

Fiesta Chicken and Rice

I've recently been trying some different recipes that may get me to enjoy chicken a little more. It's not bad or anything, I think I just had way too much of it as a child and it was all just so dry. I saw this recipe and I was interested right away. I would recommend adding black beans for some extra filling and maybe some hot sauce to liven it up a bit. I don't really thing the cheese adds anything but calories (and that's not something you will hear me say very often) so feel free to leave it out.

I'd definitely make this again.I have a 12 inch skillet and I didn't use it, I have a 3qt Braiser that I used instead. It has a lid and I think its great for one pot type dinners.

Fiesta Chicken and Rice
(Adapted slightly from Here)

Ingredients:

4 boneless, skinless chicken breasts
Salt and Pepper
3 Tbsp Grapeseed oil
2 cups long-grain rice
1 medium onion, chopped
4 garlic cloves, minced
1 teaspoon dried oregano
1 teaspoon chili powder
1/8 teaspoon cayenne pepper
1/2 teaspoon paprika
1 14.5-oz can diced tomatoes
1 red bell pepper, chopped medium
1 3/4 cups low-sodium chicken broth
1 cup shredded Cheddar cheese

Directions:

1. Season both sides of the chicken with salt and pepper.

2. Set a large skillet or braiser over medium-high heat and add the oil. When it starts to warm, after 3 minutes or so, add the chicken and cook on one side until golden brown, about 6 minutes. Take the chicken out, leaving the fat in the pan.

3. Add the rice and onion to the pan. Cook while stirring to avoid it burning on the bottom, until the rice is toasted and the onions begin to soften, about 3 minutes. Add the garlic and spices and cook for 15 seconds or so to bring out the flavours in the spices.

4. Mix in the tomatoes, red pepper and chicken broth. Bring the mixture to a boil, scraping up any browned bits from the bottom of the pan. Add the chicken back to the pan, browned side up. Cover the pan and reduce the heat to low. Cook until the chicken is cooked through, about 12 minutes.

5. Transfer the chicken to a cutting board and stir the rice and replace the cover and continue cooking until the rice is tender and the liquid is absorbed, about 5-10 minutes, depending on your rice. Meanwhile, cut the chicken into slices.

6. Turn the heat off the pan and arrange the sliced chicken on top. Sprinkle with the cheese and cover the pan again and let stand for a few minutes until the cheese has melted.

7. Serves 6-8


Tuesday, October 30, 2012

Jams and Jellies!

In my first attempt at "jamming" we made three different ones and I made a variation of one a bit later. My goal was to do Jams and Jellies that would be good for Cheese for serving. I like the idea of these as gifts which was another reason I liked the cheese type jams because I feel like maybe not everyone needs another regular strawberry jam. Making these was super easy and I'm fairly sure any one can do it. Just make sure you pay attention and take your time!

You have to completely sanitize your jars and lids. This is unfortunately a great germ breeding ground. I just ran my though the sanitize cycle on my dishwasher and boiled the lids and rings until I was ready to use them.

They exist alot of places but I got some really cool Jam tools at Williams Sonoma. Including a jar funnel, jar lifting tongs and a lid lifting magnet. These help and come in handy for sure.

We used two different types of Pectin. For my pepper jellies we used a no sugar needed Calcium Activated Pectin called Pomona's Universal Pectin. This comes with some calcium that you mix with water for your very own Calcium water. You then add this and the pectin to the future Jam mixture. I got this Pectin at Williams Sonoma. One box has so far made 16 jars and I still have enough left for say another 4. For the other two we used plain old Certo Pectin which you can pretty much find everywhere you can get jars. Certo comes with a ton of recipes and I'd say that most of the jam recipes we found were made for the Certo Pectin. Liquid or Powder.

Links and some stories below!

Jalapeno Jelly

The Jalapeno Jelly turned out great! It was really simple and a really good one to start out with. I used all Jalapenos and added a little extra sugar so it definitely has some heat. If I made it again I would probably use some green bell peppers and green food dye. Just for the look, I don't know how much they would add to the flavour. But it's not super appetizing looking with Jalapenos floating in some goo. So I think the green would help. There was no call to strain the jelly which I like but I think alot of people think this jam should just be green with no peppers actually in it. This jelly is great on cheese and even just some buns... say those Jalapeno Cheddar Rolls.. Tried and Tested. Delicious.

The recipe I used was actually right from the packet! Certo didn't come with any pepper recipes but I've found a ton more on the internet for whatever will suit your needs and wants.

Here's the recipe:

This recipe makes 4, 250mL jars. It can be easily doubled or tripled!

1 1/3 Cup Finely Chopped Jalapeno Peppers
1 1/3 Cup Vinegar
2 1/3 Cup Sugar
1/2 Cup Sugar
1 1/2 Tsp Pectin Powder
2 Tsp Calcium Water

*If you just want the regular green pepper jelly use 1 Cup of bell peppers and only 1/3 cup of hot peppers. Adjust to your needs though.

1. Bring the peppers and the vinegar to a boil.
2. Once boiling, turn down, add Calcium Water and simmer for 5 minutes.
3. Mix the pectin into the 1/2 Cup of Sugar until thoroughly mixed.
4. Add the sugar-pectin mixture to the Peppers and Vinegar, stir to dissolve.
5. Add remaining Sugar.
6.Stir vigorously while bringing mixture to a boil once again and  to dissolve the rest of the sugar and combine.
7. Remove from heat after mixture has boiled.

8. Fill jars to 1/4" of the top. Screw on the two piece lids.
9. Put in pot over boiling water to cover.
10. Boil 15 minutes (or 10 minutes + 1 minute for every 1000 ft above sea level)
11. Remove from water and let cool. Seals will suck down while cooling.

These last about 3 weeks after opened, 12 - 15 months while still sealed.


Red Pepper Jelly

I made the Red Pepper Jelly a bit later on with my boyfriends Mom. She was going to buy some from Epicure and I'm sorry Epicure, I love you but its so simple to make!! So we made some that she wanted to share with her sorority sisters. Super awesome. We used all red peppers, probably a bit over the required amount but it made the jelly a little less "floating peppers" like my Jalapeno one. We used 6 Serrano Chili peppers in it to give it some heat. If I made this for myself I would add a couple more of those peppers or not seed them all. I seeded 5/6 of them because she didn't really want the crazy heat I would enjoy.

Recipe for this one:


This recipe makes 4, 250mL jars. It can be easily doubled or tripled!

1 Cup Finely Chopped Red Bell Peppers
1/3 Cup Chopped Serrano Peppers (seeded if you don't like as much heat)
1 1/3 Cup Vinegar
2 1/3 Cup Sugar
1/2 Cup Sugar
1 1/2 Tsp Pectin Powder
2 Tsp Calcium Water

Follow the same steps as above that I used for the Jalapeno Jelly.


Ginger Pear Jam

I had really high hopes for this one since I love the spice of ginger. We actually doubled the ginger and it still didn't make it all that "warm" I suppose.I won't lie to you. I hated making this one. We had to peel and core all the pears, which was alot. Then had to grate them on a cheese grater. My hands got pruney. It was horrible. The result was worth it though. Also I find it to be a little bit like an applesauce. Still another success!

Here's the link to the Ginger Pear Jam!

Apple Cinnamon Jam

This one was really hard. Maybe not hard, but it was complex. We ended up over cooking it slightly so its a little closer to a candy loaf or something. Still delicious though.

Here's the link for the Apple Cinnamon Jam, hopefully you will have better luck than we did!


Sunday, October 14, 2012

Caramel Apple Cheesecake Bars with Streusel Topping

The name itself got me with this one. It's so long! How could it be bad? But I definitely thought it would be more complicated. I did the whole recipe, including cooking time, in just under an hour. Also, I liked that the ingredients were fairly simple and most people would probably have most or all of them. Understand that this was originally a Paula Deen recipe, there is no shortage on calories!

Since its baking I didn't change anything. If I made these again, which I probably will, I think I would add more apples. Just one more, as the apple flavour was really lost in mine, even though I used the stronger granny smith apples as directed. I don't usually use Granny Smith, since I don't really like them as much as other types of apples. I also found there was a bit too many oats and streusel topping generally. That may have been why the apples weren't the star at all. I also thought about making these with strawberries instead and maybe a thinned whipped cream drizzled on them instead of the caramel sauce.

I just bought my caramel sauce and drizzled on top before serving since I was trying to keep the recipe quick and easy. But making a caramel sauce while the bars are cooking or cooling wouldn't be too big of a deal. They did need about an hour to cool.

Here's the picture and recipe!

Caramel Apple Cheesecake Bars with Streusel Topping
(Adapted slightly from Tracey's Culinary Adventures)

Streusel Topping
 1/2 cup packed light brown sugar
 1/2 cup all-purpose flour
 1/4 cup quick cooking oats
 1/4 cup (4 tablespoons) unsalted butter, at room temperature

Crust
 1 cup all-purpose flour
 1/4 cup packed light brown sugar
 pinch salt
 1/2 cup (1 stick) unsalted butter, at room temperature

Filling
 1 (8 oz) package cream cheese, at room temperature (low fat is fine)
 1/4 cup sugar, plus 1 tablespoon, divided
 1 large egg
 1/2 teaspoon vanilla extract
 pinch salt
 2 small Granny Smith apples, peeled, cored and finely chopped
 1/4 teaspoon ground cinnamon
 1/8 teaspoon ground nutmeg


Preheat oven to 350 F. Line an 8-inch square baking pan with aluminum foil, leaving an overhang on opposite sides to lift the bars out afterward. Spray the foil with nonstick cooking spray.

To make the streusel: In a small bowl, combine all of the ingredients. Use a fork (or a pastry cutter) to combine until the mixture becomes crumbly. Refrigerate while you finish making the bars.

To make the crust: Stir the flour, brown sugar and salt together in a medium bowl. Add the butter, and use a pastry cutter to work the butter into the dry ingredients until the mixture resembles coarse meal. Press into an even layer in the bottom of the prepared pan (if the mixture is sticky, pop it in the fridge for a few minutes - it's easier to press into the pan when cold). Bake for 15 minutes, or until light brown and set. Remove the pan to a wire rack.

To make the filling: In the bowl of a stand mixer fitted with the paddle attachment, beat the cream cheese with 1/4 cup of the sugar until well combined and smooth. Add the egg, vanilla and salt, and beat just until the mixture is uniform. Pour over the crust (it's fine if the crust is warm, no need to cool it completely).

Combine the apples with the remaining tablespoon of sugar, the cinnamon and nutmeg in a medium bowl. Stir until evenly coated. Distribute the apples evenly over the cream cheese mixture. Sprinkle the streusel topping over the apples.

Bake for 30-35 minutes, or until the filling is set. Remove the pan to a wire rack and let the bars cool completely, then refrigerate for at least a few hours. Use the foil handles to lift the bars out.

I drizzled the Caramel Sauce (store bought) over them after cutting for a decorative effect!

Makes about 16 bars (depending on how large you cut them)


Saturday, October 6, 2012

Mudslide Cupcakes

It was one of my friends 25th birthdays so what better than cupcakes loaded with booze? I found these on my favourite food blog -Tracey's Culinary Adventures and was interested right away. It was maybe a little sad I already had all the ingredients...

These were a pretty labor intensive cupcake compared to a lot of the ones I've made in the past. To me they turned out a bit dry, but they were a hit with everyone that tried them. Altitude has alot to do with that though, so I recommend only adding in flour a bit at a time until the batter looks good to you. Or to change your recipe when you make it again. Sometimes you just can't tell. I got 24 big cupcakes and 6 mini ones. With the full amount of icing (I doubled the Bailey's one) I used all of it minus a little maybe but I piped mine up nice and high too.

I would definitely make the boozey cake batter again. As for the icing, I agree with what Tracey said in her blog, I'd cut down on the Bailey's. It was waaaay too much for me. And I even put coffee in, instead of 2 TBSP of the Bailey's. I didn't do the swirled icing. Just the baileys flavour to have "equalish" parts of the coffee, boozey and chocolate flavour. I've also made the Margarita cupcakes she mentions, loaded with tequila, and these were definitely more intense.

But like I said, they were loved around the table.

Heres the recipe!

Mudslide Cupcakes
(Adapted from Tracey's Culinary Adventures)

Cupcakes

2 1/4 cups all-purpose flour
1/2 cup unsweetened cocoa powder, sifted
1 1/2 teaspoons baking soda
3/4 cup french vanilla coffee, at room temperature
3/4 cup French Vanilla Kahlua
3 large eggs, separated and at room temperature
3/4 cup granulated sugar
1/2 cup (1 stick) unsalted butter, at room temperature
1 cup packed light brown sugar

Bailey’s Buttercream

1 Cup unsalted butter, at room temperature
6 cups confectioners' sugar, sifted
4 teaspoons vanilla extract
6 tablespoons Bailey’s Irish Cream
2 tablespoons Vanilla prepared coffee

Preheat oven to 350 F. Line cupcake pans with paper liners.

Whisk the flour, cocoa powder and baking soda together in a medium bowl.

Combine the coffee and Kahlua in a measuring cup.

Add the egg whites to the the bowl of a stand mixer fitted with the whisk attachment. Beat on medium-low speed until foamy. With the mixer still running, gradually add the granulated sugar. Once incorporated, increase the mixer to medium-high speed and continue beating until stiff peaks form - the egg whites should be glossy, not dry.

Transfer the egg whites to another bowl and clean out your mixer bowl (or use a second bowl if you have one).

Fit your stand mixer with the paddle attachment, and cream the butter and brown sugar on medium speed until light and fluffy. Add the egg yolks, one at a time.

With the mixer on low speed, alternately add the flour mixture and the coffee/Kahlua mixture, beginning and ending with the flour mixture.

Use a rubber spatula to fold in the egg whites.

Divide the batter evenly between the prepared liners, filling each about 2/3-3/4 full.

Bake for 18-20 minutes, or until the cupcakes spring back when lightly pressed and a toothpick inserted in the center comes out clean.

Transfer the pan to a wire rack and let the cupcakes cool for 5 minutes then remove them to the rack to cool completely.

To make the Bailey's buttercream:

Beat the butter and powdered sugar in the bowl of a stand mixer fitted with the paddle attachment (it will look almost sandy). Add the vanilla extract and Bailey's and beat to incorporate. Once the frosting comes together, increase the mixer to medium-high speed and beat until smooth and fluffy.

I piped the icing onto the cupcakes one they were fully cooled. That's super important otherwise it melts away!

Here's my picture!


Tuesday, September 25, 2012

Spinach Pesto - Again?

Today I was at Wal-mart and their giant boxes of spinach were on sale for $4. It was definitely because they were super close to their expiration. But at the other stores these are closer to $8. So worth it!

Since it was clearly going bad I also bought some feta (a whole $9 at Wal-mart) because I knew I could make a whole bunch of pesto and freeze it. I had all the other basic things at home.

For 10 oz of Spinach I used:

6 TSP Lemon Juice
6 TSP Garlic Olive Oil
6 TSP Extra Virgin Olive Oil
185g Feta
6-10 TBSP Chopped Basil

I put it all in the food processor and blended it up. Put it all in separate little tupperware containers to freeze.

The main reason I wanted to re-post this was to add some extra things you can do with this amazing green goo.

Make your own Spanakopita appies - Spoon between some puff pastry triangles
Pesto Stuffed Chicken - Cut a hole in a chicken breast horizontally - not the whole way through. Stuff and cook!
Mix with pasta for some classic Pesto - this is what I usually do.
Make your own spinach & feta perogies - I'll do this and post a recipe.

I'm sure there's a ton more things you could do with it, just some of the basics. Here's a couple pictures!


My Ingredients and tubs of "goo":


My Pasta with some steamed and seared shrimp:


Sunday, September 23, 2012

Butternut Squash Apple Soup

Today for dinner I had Butternut Squash Apple Soup and a Jalapeno cheese bun with some Jalapeno Jam on it. This is happiness people. I made every single thing I ate. It might still be a bit early in the year for a thick soup like that. Its still over 20 every day. But I saw it in one of the cookbooks at Williams Sonoma and I had to make it. It seemed too simple. But it turned out great!

As usual I changed some things for what I had and added some extra spices (read: flavour). If you've never cut, cubed and peeled a squash you are not missing out. It was horrible. I probably had quite a bit of waste on my squash due to me really just not wanting to deal with it. I have excellent knives, but can never get good at this. Also, I've peeled so many apples in the last week that I'll never mope about skin again.

Ok! Here's the recipe, and below what I changed and added.

2 TBSP Olive Oil
1 Thinly Sliced Yellow Onion
Sea salt
1 Clove Garlic
1 Litre Water or Low Sodium Chicken or Vegetable Stock
3 Lbs Butternut Squash (Peeled, seeded and cubed)
2 Apples (Peeled, Cored, Chopped)
1/4 TSP Fresh Nutmeg
6 TBSP Plain, Low Fat Yogurt - For Serving

Things I changed;

More Olive oil, kind of as needed for to get the onions and garlic cooking.
2 cloves of garlic, grated.
I used super low sodium chicken stock, but I made up for it with some extra salt.
3 Lbs = 2 Squashes for me.
I used 3 apples, they were small and I figured why not?
I used No Fat Greek yogurt. Thicker and some extra tang.
I also added a pinch of cumin, cinnamon and pepper. A bit heavier on the pepper.

Once you've measured out your ingredients and cut up all that squash you're honestly pretty much done.

Pour the oil into your pot, I used my large dutch oven. Grate the garlic into the pot and put the onions in. Cook until slightly translucent - about 5 minutes or so.

Add the cubed apple and squash to the pot.

Add your spices! Be gentle on the S&P as you can add those before serving and stir in too.

Pour the stock/water over top.

Bring to a boil.

Once boiling, reduce to a low simmer and cook for 20 minutes.

After 20 minutes, make sure you can easily pierce a cube of the squash with a fork.

When you can do that, transfer your soup to either a food processor or vitamix in batches to puree. If you have an immersion blender, this is pretty much what it was made for. I used my immersion blender. It pureed the now soup really quickly and I didn't have to mess around with hot liquid transfer.

That's it! Ready to eat!

I liked to take everyone's soup spoons and put the greek yogurt on them, then serve it with the spoon of yogurt half resting in the soup. Easy to stir around into the soup. I didn't add it every time I served it, but I liked the added (fake) richness it brought since there's no cream or milk in this soup!

Enjoy!

Here is the cookbook I used for the recipe:

Healthy in a Hurry


Monday, September 17, 2012

Apple Cream Pie

I have never made my own pie crust. I always eeep out and buy the Presidents Choice butter puff pastry. Which by the way is fan-freaking-tastic. But I've been watching so many baking shows lately and pie is apparently all the rage.

One of the other great food bloggers I follow on twitter posted this recipe for Apple Cream Pie and I was instantly in. If you have read my other posts, you know I work at a Williams Sonoma. Which is handy. I have all pie making necessities at my fingertips. I've had an Emile Henry Fluted pie plate for a year, and I've only used it for dutch baby pancakes. So I figured all right! Bought a special pie type rolling pin and was ready to go. I also already had some cute pie crust cutters that I haven't gotten alot of use out of. So I figured I'd use those to cover the imperfections. Which I'm sure there will be many.

I hated pie/pastry dough before I started. It didn't get better. I used a pie crust mix that I bought and only had to add butter and water. I had the butter super cold. I put it in the freezer before I cubed it into 1 cm cubes. I used ice water that I kept in one of those awesome frozen cups. It would not come together for the life of me. I added extra water, then flour and finally it mostly worked. Also, if any one has a stretch wrap they swear by, please let me know. I tried Glad and Co-op brand today. They didn't even stick to themselves. It added to my grumpy. I let the crust sit in the fridge for most of the day and it had pretty much stuck by the time I rolled it out.

I put it in the bottom. Pressed it into each flute. Cut off the extra, put it in the fridge. Prepared the apples and the mixture and let it mingle in a bowl for a while. I rolled out the top crust while it was sitting. I wanted to make sure my poor (already over handled) pie crust stayed cold until I needed it. I put the apples in the plate and put the top crust on. Using a rolling pin (TV show style) to wrap the crust around and roll into/on to the pie is brilliant. It made me feel like a pro. I pushed/sealed the crust into the flutes and cut 4 vents in the top. I rolled out the scraps and cut out my little leaves and acorns with my crust cutters. The little shapes only take 5-10 minutes to cook up nice.

At about 20 minutes left I attempted to cover my crust with tinfoil, because for some reason I was too cheap to buy the fluted crust cover for my pan. Noted. I failed in covering it. Ah Well. First pie. I can get away with it. It started bubbling out of a crack (sad) and my vents and over flowing on to the bottom of my oven. Says my smoke alarm. There's alot to be said for a well ventilated kitchen.

I give alot of credit to my wonderful plate for making this pie look pro. But I may take a little credit. Maybe I'll ask the boyfriends Mom for Pie Crust pointers. The hate is equal across my family. It smells great. Be a little jealous as you read this.

Apple Cream Pie
(Adapted from here)

Ingredients:

5 cups of apples, sliced and peeled - about 6 Apples
1/2 cup white sugar
3/4 cup brown sugar
1 1/4 cup whipping cream
3 1/2 tbsp cornstarch
1 1/2 tsp cinnamon
pinch of nutmeg
pinch of cloves
1 tsp vanilla

Pie pastry recipe for double pie crust (I used a box mix), Divided in 2.

Directions:

Preheat oven to 400º

Put half your crust mix in the bottom of the pie plate and fill it with the cut and peeled apples.

Mix together the cream, sugars, cornstarch, spices and vanilla until combined nicely. Pour over apples, stirring through them so they're coated evenly.

Place the top crust on the pie, I recommend using a rolling pin to roll it up on to and roll it off over the pie. Cut 3-4 vents in the center (unless you have an awesome pie bird) and cut the edges off around the pie plate.

Using the lowest rack of your oven, bake for 15 minutes at 400º, then lower the temperature to 375º and bake for about 40-45  minutes more.

When your pie edges start to become too brown, about 20-30 minutes though cover the edges with tinfoil or use a pie crust cover. As I mentioned above, I wish I had bought one.

Continue baking until you see the pie filling bubbling through the vents (that will happen) and the pie is a nice golden brown.


Saturday, September 15, 2012

Savory Spaghetti

This is a recipe I found in Self Magazine. It, of course, was about one of the different diet plans they seem to have every few months. I had most of the ingredients so I figured I'd change it up and give it a try. My adapted recipe is below!

Here's the original recipe:

Serves 1

3 TBSP rice wine vinegar
1 TBSP creamy Peanut Butter
1 TBSP Orange Juice
1/4 TSP Low Sodium Soy Sauce
2 Cups chopped Kale
1 TSP Olive oil
2/3 Cup cooked whole wheat spaghetti
1/2 Cup Cannellini beans
1 TSP Scallions sliced

- Combine the first four ingredients in bowl until smooth. Natural PB works better for this.

- Saute Kale in olive oil until wilted.

- Add spaghetti, beans and peanut sauce.

- Stir until warmed through

- Serve with Scallions.

________________________________

Mostly I just made this dish simpler and to fit what I had. I had a spicy peanut butter in my pantry (Peanut Butter Co) so I used that, which gave it quite a bit of extra heat. It has many different peppers and chilis in it. I used spinach instead of Kale and I didn't use beans or scallions. I did substitute shrimp which I'd peeled and steamed quickly instead. Shrimp was made for peanut satay sauce. Tonight I also used my own pasta that I made in the last post! The home made pasta was amazing. And once I get it all figured out I may never buy pasta again.

Here is my adapted recipe:

3 TBSP rice wine vinegar
1 TBSP creamy Peanut Butter
1 TBSP Orange Juice
1/4 TSP Low Sodium Soy Sauce

2 Cups chopped spinach
1 TSP Olive oil

Mix first 4 ingredients in a bowl or measuring cup

Saute spinach in oil

Add cooked pasta and Sauce, stir until warmed through.

____________________________________

I doubled the recipe and was left with some extra sauce, you could probably do 1.5 times for 2 people, if you don't like it super saucy then just that recipe will be fine for the sauce.

I forgot a picture, because it just looked so tasty. But I'll make it again soon!


Thursday, September 13, 2012

Fresh Pasta


I think this may be my biggest food related leap of all time.

I'm so excited to make my own pasta though. I bought a hand crank pasta roller at Williams Sonoma this week. It was my 6 months with my boyfriend on Monday so we thought we'd do some dinner on Friday night for it. I'm planning to make a spicy peanut satay sauce on spaghetti type noodles with large shrimp. More on that later! But I thought what could be better than making the pasta myself too?! So I'm going to try it. And if I decide after a few times I really hate it, I'll just use my roller to make perogies. Or upgrade to the kitchenaid attachment. (It was alot more expensive for a noob like myself).

I'll post some pictures of the (what I assume will be) event of making my pasta. As well as all the normal stuff, what I'd change (hopefully nothing, there's 3 ingredients), if I liked it and if I'll manage to do it again. I plan on making it tonight so that if I screw up majorly I won't be as sad about it tomorrow. Here goes.

Step 1

Flour and Eggs and a splash of oil. I used about half and half semolina and unbleached all purpose.


Step 2

Mix with hands until dough forms. This was no where as easy as it looked. Which I should have assumed. I had to add some more liquid. I added some water and oil. Nothing was working. I added another egg. And then some more AP flour. Finally, dough.

You have to let the dough sit at least 30 minutes. Mine was definitely still not elastic enough after that. I let it sit about another hour. 90 minutes total in a sealed plastic bag.


Step 3

Cut the dough ball/lump in half. Roll through the press several times on the largest setting. I did this about 5 times. Folding it over and rotating it each time. From here I went thinner. My Pasta roller has 6 settings. I went from 0 - 4. 0 being the thickest, 4 as thin as I went for my Spaghetti noodles.

Step 4

After it was thin enough I put it through the spaghetti attachment that's included. Then Spaghetti happened!


I'm not at taste yet. I laid it out to dry for a couple minutes, sprinkled it with some extra semolina flour and put it in a large ziplock in the fridge. I hope its amazing. It took too long to not be. I'm sure after you do it a few times it gets easier to figure it out and you find a good recipe. But I can't wait to try it.

Here's the link to the recipe I used and then manipulated to my needs. I think it may have a lot to do with the dryness in Calgary that I had to add so much extra liquid.

Fresh Pasta


Wednesday, September 12, 2012

Baked Two-Cheese Penne with Roasted Red Pepper Sauce

This is a recipe from one of the many cookbooks I have hidden away. I've been meaning to try it for a while but getting out to get the ingredients.

Truthfully, the only thing I needed was fontina cheese. I was horribly disappointed to find Fontina discontinued at my grocery store. I bought one called Red Rouge instead, it's Fontina like. When I got home I was again sad to see for once I didn't have penne. I had macaroni. Good enough!

Here's the recipe below, and underneath that what I ended up thinking.

1 Cup Uncooked Whole-Wheat Penne
2 TBSP Olive Oil
2 TBSP Flour
Salt
Pepper
1 1/2 Cups Milk
1 OZ Gouda (Shredded)
2 OZ Fontina (Shredded)
1/4 Cup Panko Bread crumbs
1/2 Cup Roasted Red Pepper
1 TBSP Greek Yogurt

Heat Oven to 350F
Prepare 8" Baking Dish

Bring water to a boil, add pasta, cook, drain and set aside

Reduce Heat to med, add oil, flour, salt and pepper to taste. Cook 1-2 Minutes until flour browns slightly. Stir in milk 1/2 cup at a time, whisking to ensure smooth. Stir in cheeses until completely mixed and smooth. Stir in cooked pasta.

Transfer to prepared baking dish.

Top with panko and bake for around 20 minutes.

While baking, add the bell pepper and yogurt to a food processor or blender and process till smooth.

Cut pasta into 4 pieces, drizzle with roasted red pepper sauce.

_____________________________________


Ok, the only things I changed were the cheese and  pasta cut - as I mentioned.

At first glance I knew that this was not going to cover a 8" Square baking dish. I used a 8x5 and it hardly covered that one.

Also I just roasted my own Red Pepper. If you don't know how to do that - its super simple! I cut a red pepper in half, put on a cookie sheet and broiled it for 3 - 5 minutes. Until the skin is black. Place the pepper in a bowl, cover with stretch wrap and leave it till cool. About 10 minutes. When you take the stretch wrap off the bowl, the pepper should peel easily. I had to add an extra spoon of greek yogurt so it wasn't as runny.

I got this from, "The CarbLovers Diet" book. I like this book. Things are filling and the portions are usually good. It says this recipe is supposed to be 433 Calories/Serving. My calculation was much closer to 300. Sooo I had more than the 1/4 of the recipe. About 1/3. If you make this, you'll see, its not alot. I'd like to think its a mistake, but who really knows. Those counts depend on so many things.

I LOVE the addition of the red pepper yogurt sauce. It freshens it up and adds a whole other layer of flavour.

I'd highly recommend this. But cook it in a smaller dish or add more pasta. It was tasty for sure.


Here's a picture, I know - it doesn't look super appetizing. But it is, I promise.

Pickling

I've had a little surge of inspiration of the past week or so, as long as it keeps up there's going to be so many new recipes up here soon!


Recently, I got invited to a pickling party. I've never done this. I've never had family that's done this. I was super interested. One of those things I may be "supposedly" too young to know how to do. Big Deal.

So I headed to the Farmer's Market with my friend. We bought more "cukes" then I ever thought we'd use, pounds of peeled garlic, beans, chili's, lemons and asparagus.

I may not have had the full pickling experience. I bought some cute, tall, Weck jars from Williams Sonoma and dropped them off with my friend. She did all the sanitizing, boiling, brine making and sealing. I stuffed jars mostly. (I was so impressed at my beginner jar stuffing skills. I got 2 pounds of cukes into one jar... it was a big jar. BUT it happened.) But I think I understand the jist of it.

My friend was kind enough to share the brine recipes we used for the pickles and asparagus/beans. Here they are below!

Pickles:

Rose’s Dill Pickles (My Friends Great Grandmother- you're welcome)

step 1 - sterilize jars
step 2 - wash cucumbers in cold water
step 3 - put large sprig of dill in jar
step 4 - two - three cloves of peeled garlic in jar
step 5 - pack cucumbers in jars, bigger on bottom, smaller near the top
step 6 - put large sprig of dill in jar (top)
step 7 - two-three cloves of peeled garlic in jar (top)
step 8 - small bay leaf
step 9 - optional red pepper
step 10 - 12 cups water, 3 cups vinegar, 1 cup “pickling salt”

bring brine to boil, boil for 1-2 minutes, fill jars

Pickles are technically ready after one week, but taste better after one month!

__________________________________

And here's the link for: Spicy Asparagus & Beans Brine

And a picture!


Tuesday, September 11, 2012

Jalapeno Cheddar Rolls

*Updates*Below*

I saw these on one of the cooking blogs I follow regularly, and I had to make them asap! The only thing I needed was some Jalapenos, so after a trip to the store I made them right away.

I added more cheese and an extra Jalapeno. I knew that these weren't going to be that spicy with the ribs and seeds removed and I wish I had stuck to my gut and left a few ribs in. To me they didn't have much Jalapeno or Cheddar flavour. But I will try again! The other thing that concerned me a little was there was no direct yeast proofing step. They did rise, but I expected a bit more.

The recipe also said to cook 25 minutes. I had to cook these for almost an hour, 55 minutes, in my non convection oven.

Kitchen Tip: I preheat my oven to as low as it will go, about 170 F. When its heated I turn it off and let it sit with the door open a couple minutes. I then put my dough that needs to be risen into this now warm oven. The amount of rising you will get vs on your counter is incredible! Always make sure you cover it with a damn towel or stretch wrap or it'll get a bit crusty this way.

Don't get me wrong, as is, these are great - and almost gone. Here are the things I'm going to try next time.

- I will only remove half of the ribs, but still all the seeds. OR dry the jalapenos slightly under the broiler to help add some heat.
- I'm also going to proof my yeast in the warm water with the sugar and then mix in to the dough. I don't know how much of a difference it will make but it seems worth a try.
_________________________________________________

Ok, I had a bunch of Jalapenos left over from making Jalapeno Jam (still working on those posts) so I figured I could give these another try, with my changes of course. There's a serious victory to being right about something. It probably made me jump happily up and down a little. But the only one here was my dog, so you'll never know.

I used 3 peppers this time, but removed seeds and ribs from one and kept them in the other two. Minus the ones that fell out. I also added a bit more cheese. Probably about 1/6 of the 700g block each time. I doubled the recipe again.

I proofed my yeast. I had no idea if this would make a difference or if it would just be some wasted time so why not? To do this I added 1 TBSP (of the 3) of the sugar to the hot water and sprinkled the yeast on top. While this sat for 5 minutes or so I combined the rest of the recipe as directed. Complete with the other 2 TBSP of Sugar. I wish so badly that I had taken a photo of what the risen dough looked like last time. I sure did this time! I had the same amount of dough in 2 different sized oiled bowls. THIS is what risen dough should look like. The one is touching the stretch wrap! I got 22 buns vs the 17 I got last time because there was just so much more air. I once again used my method to letting the dough rise in the warm oven.

I wasn't going to do the egg wash this time but I regretted it instantly when I took them out to switch their places in the oven (bottom to top, half way) so I quickly added it on since they had at least another 15 minutes left.

These only took 30 minutes to cook this time, compared to 55 last time.

They don't look much different after they're done. They're lighter and fluffier than my last ones and are a bit bigger.

Jalapeno Cheddar Rolls
(Adapted slightly from Jalapeno Cheddar Rolls)

1 3/4 teaspoons instant yeast
3 1/4 cups all-purpose flour
3 tablespoons sugar
1 teaspoon salt
6 oz sharp cheddar cheese, shredded
3 large jalapeños (seeds and ribs removed), finely chopped
1 cup water water (100-110 F)
2 tablespoons canola oil
2 large eggs, at room temperature

I added 1 TBSP (of the 3) of the sugar to the hot water and sprinkled the yeast on top. While this sat for 5 minutes or so.

While this is sitting - Add the flour, remaining sugar, salt, cheese and jalapenos to the bowl of a stand mixer fitted with the dough hook. Beat briefly on low speed to combine. In a measuring cup, whisk the water, oil and 1 of the eggs together until combined. With the mixer on low, slowly add the wet ingredients and continue mixing until the dough comes together (you may need to scrape down the bowl once or twice). The dough should clear the sides of the bowl and cling to the bottom - you may need to add a little flour or water to achieve the right consistency (every time I've made this recipe I've needed to add 2-4 tablespoons of flour). Knead the dough on low speed for about 5 minutes, or until smooth and elastic.

Spray a large bowl with nonstick cooking spray. Shape the dough into a ball and place in the bowl. Cover with plastic wrap and let the dough rise for 75-90 minutes, or until doubled in size. ** See kitchen tip

Preheat oven to 350 F. Line a baking sheet with parchment paper.

Transfer the dough to your work surface and divide in half. Divide each of the two pieces into 4 or 5 equal pieces, depending on whether you want oversized or more traditional rolls. Shape each piece of dough into a ball and place on the prepared baking sheet, then flatten slightly with the palm of your hand. Space the rolls about 1/2 to 1-inch apart - you want the edges to bake together in the oven.

Cover the pan with a damp towel, and allow the rolls to rise for 35 minutes. Meanwhile, whisk the remaining egg with 1 tablespoon of water to make egg wash. Brush the rolls with the egg wash. Bake for about 25 minutes, or until the tops of the rolls are deep golden brown.

Transfer the pan to a wire rack and let the rolls cool for at least 15 minutes. Store in a resealable plastic bag at room temperature, or wrap tightly and freeze.

Makes 8-10 rolls

Here's the dough picture:


Here's the final Product!


Mini Cheesecakes

I have a bit of a cheesecake obsession. I'm always looking for a new one. Recently I've had a couple occasions (excuses) to make some mini cheesecakes. These are my favourite. Since they're rich you can split one, but if you have a whole one its not so bad...

The first one, with berries on top was for meeting my boyfriends Mom, around her birthday. I hoped it would help me out a little.. AND it did :)

The second one was to celebrate a nice raise at work. Who doesn't deserve cheesecake??

I have a mini cheesecake pan that makes 6 cheesecakes. I always follow the recipe on the pan pretty closely for amounts, but I'm pretty sure a 9-10" cheesecake would make the same amount. The saddest part about this post is that Williams Sonoma no longer carries this pan. I'm sure you can find something like it somewhere though. Bed bath and beyond always has fun pans!

Here's the recipe and then another one I modified a bit to make chocolate swirl cheesecakes. I always use either all light cream cheese or at least half light and half regular.


Recipes:

Crust:
5 TBSP Butter, Melted
8 Graham Crackers (140g), Crumbled
2 TBSP Sugar

Filling:
500 G Cream Cheese, cut into cubes - Room Temp
3/4 Cup Sugar
1.5 TSP Salt
2/3 Cup Cream
2 Eggs

Set oven to 325F

- Pulse crust ingredients in food processor until it starts to stick together.
- Divide evenly among Cakes
- The recipe said to use your fingers but I found that the bottom of glass worked perfectly
- Pre bake the crusts for about 10 minutes or until set.

Lower the Oven Temp to 300F

- The recipe suggests using a food processor to cream all the ingredients together, this or a mixer will work fine!
- Mix the cream cheese first until smooth, then add the other ingredients.
- Mix till well blended.
- Divide the filling between the cakes, about 2/3 cup in each

- Bake the cheesecakes until the edges are set but the middle is still slightly wobbly. 48 - 52 minutes.
- I don't have a convention oven, I found they took about 55 - 60 minutes
- Transfer to a wire rack (still in pan) and let cool for 2 hours.
- Push cheesecakes out of pan and remove from disks. Transfer to parchment lined sheet and refrigerate for at least 4 hours, or up to 2 days.

______________________________

The things I changed the second time:

- I used Oreo crumbs
- I used all light cream cheese (I usually use half light and half full fat)
- 1% Milk instead of cream
- I melted 1/4 cup semi-sweet chocolate chips and added it to half of the cream cheese mixture
- I poured the chocolate on first, the regular cheese mixture on top
- I attempted swirling with a wooden skewer

- I also used a water bath, a brownie pan filled 3/4 with water in the over at the same time.
- I left the cheesecakes in the oven after it was off for about an hour

These were the best looking cheesecakes I ever made, they didn't crack or fall at all.

______________________________


My cheesecakes have a tendency to fall and crack without a waterbath so I covered these with berries and made a chocolate drizzle.They were well loved... And no one saw the cracks!

 
My Chocolate swirl cheesecakes didn't quite swirl, I was afraid I'd disrupt the bottoms. But they still turned out great. They had a waterbath, well a brownie pan underneath.